
Companies have a tough job of knowing more about their customers. It’s tougher when companies need to know what customers think of their products. Anything customer feedback is valuable to any company. What other data-driven methods can companies use to understand their customers more? Sentiment analysis.
What is Sentiment Analysis?
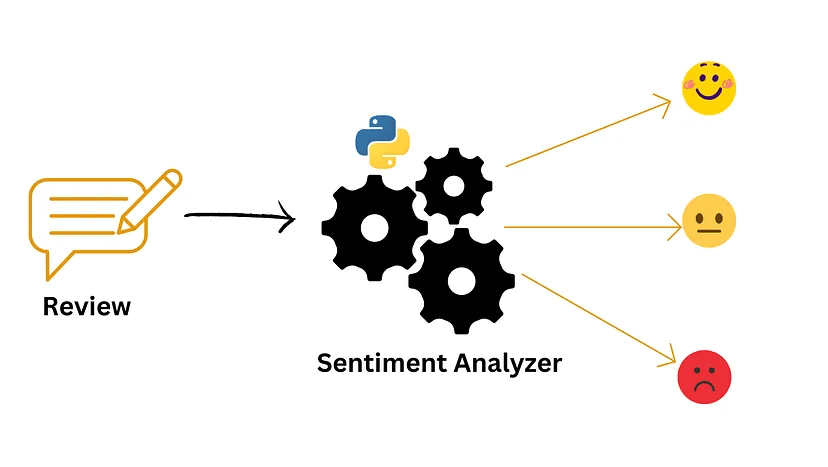
Sentiment analysis is a method to analyze texts and determine the sentiment, tone, or opinion behind those texts. The technology behind it is natural language processing (or NLP) and machine learning algorithms.
The main goal of such analysis is to categorize if those texts have a positive, negative, or neutral sentiment. Few examples of these texts are, but are not limited to, social media posts, chat logs, or customer reviews.
In digital marketing, sentiment analysis has several important uses such as:
- Customer feedback analysis
- Brand monitoring
- Campaign analysis
- Market research
Digital marketers leverage this approach to know about their current and future customers. It’s used to know the experiences and opinions of those customers related to their product. In effect, it allows companies to improve their products in a data-driven way.
Requirements for Sentiment Analysis in Python
I hope you have already installed Python 3.x on your machine and if not then please install. We also need three third-party libraries of Python.
- Requests – This library makes an HTTP connection with the webpage. It helps us to extract the raw HTML (HyperText Markup Language) from it.
- BeautifulSoup – This is a powerful web scraping or data parsing library. It extracts data out of the raw HTML we get using the requests library. It’s also here where we extract the text for sentiment analysis.
- vaderSentiment – VADER, also known as Valence Aware Dictionary and Sentiment Reasoner, is a sentiment analyzer based on rules, which has undergone training using text data from social media.
- Pandas – This is a library that manipulates data structures. It turns raw unstructured data to spreadsheet-like data structure for readability. Best used for data analysis.
In this article, we are going to analyze product reviews from Amazon. We’ll scrape these Amazon pages and see whether the reviews of the product are positive or negative.
What Text to Use for Sentiment Analysis?
We will scrape this Apple Macbook Pro review page from Amazon to get the text we want to analyze. What is web scraping? Web scraping is extracting text from a web page with code. It’s faster and more automated this way than relying on raw text files to downloaded to computers. We don’t need to upload raw text files for our sentiment analysis.
How to Do Sentiment Analysis Using Python
So how do we start?
Create a Python file in a folder where you will write the code. For this guide, Python is the programming language. I recommend using Jupyter notebook. You may use any text editor like Visual Studio Code or Atom if you prefer.
Complete Code:
Below is the complete code. You can copy and paste everything and it should work. The rest of the article is the explanation.
import requests
from bs4 import BeautifulSoup
from vaderSentiment.vaderSentiment import SentimentIntensityAnalyzer
import pandas as pd

target_url = 'https://www.amazon.com/Apple-MacBook-Laptop-12-core-19-core/product-reviews/B0BSHF7WHW/'
headers={"accept-language": "en-US,en;q=0.9", "accept-encoding": "gzip, deflate, br", "User-Agent":"Mozilla/5.0 (Windows NT 10.0; Win64; x64) AppleWebKit/537.36 (KHTML, like Gecko) Chrome/111.0.0.0 Safari/537.36"}
response = requests.get(target_url, verify=False, headers=headers)

soup = BeautifulSoup(response.text, 'html.parser')
fulldivcontainer = soup.find_all("div",{"class":"reviews-content"})[1]
reviewdata = fulldivcontainer.find_all("span",{"data-hook":"review-body"})

data_dictionary = {}

for i in range(0,len(reviewdata)):
    data_dictionary["review{}".format(i+1)]=reviewdata[i].text

sentiment = SentimentIntensityAnalyzer()

review_list = []
negative_list = []
neutral_list = []
positive_list = []
compound_list = []

for x in range(0,10):
    sentiments = sentiment.polarity_scores(data_dictionary["review{}".format(x+1)])
    review_list.append("Review {}".format(x+1))
    negative_list.append(round(sentiments['neg'], 2))
    neutral_list.append(round(sentiments['neu'], 2))
    positive_list.append(round(sentiments['pos'], 2))
    compound_list.append(round(sentiments['compound'], 2))

data = zip(negative_list, neutral_list, positive_list, compound_list)
df = pd.DataFrame(data, index=review_list)
df.columns = ["Negative Score", "Neutral Score", "Positive Score", "Compound Score"]

print(df)
Note that the URL (in bold text) needs to change depending on the Amazon review page you want to do sentiment analysis on. However, the code above only works for Amazon and requires some tweaking if you prefer to use a different webpage. Python knowledge is required.
Import Libraries
import requests
from bs4 import BeautifulSoup
from vaderSentiment.vaderSentiment import SentimentIntensityAnalyzer
import pandas as pd
The code imports the necessary libraries:
requestsfor sending HTTP requests to the target URL.BeautifulSoupfor parsing HTML and extracting data from it.SentimentIntensityAnalyzerfromvaderSentiment.vaderSentimentfor sentiment analysis.pandasto create a DataFrame later on.
Download HTML Data from Amazon
The very first step is be to make a GET request to the target page. To recap, we are going to use an Apple Macbook Pro review page from Amazon.
To make the GET request we are going to use the request library of Python.
target_url = 'https://www.amazon.com/Apple-MacBook-Laptop-12-core-19-core/product-reviews/B0BSHF7WHW/'
headers={"accept-language": "en-US,en;q=0.9", "accept-encoding": "gzip, deflate, br", "User-Agent": "Mozilla/5.0 (Windows NT 10.0; Win64; x64) AppleWebKit/537.36 (KHTML, like Gecko) Chrome/111.0.0.0 Safari/537.36","accept": "text/html,application/xhtml+xml,application/xml;q=0.9,image/avif,image/webp,image/apng,*/*;q=0.8,application/signed-exchange;v=b3;q=0.7"}
response = requests.get(target_url, verify=False, headers=headers)

print(response.content)- The
target_urlvariable holds the URL of the Amazon product reviews page that is scraped. - The
headersvariable contains a dictionary of HTTP headers. These headers are used in the request to mimic a web browser’s user-agent, set the accept language, and specify the accepted response types. - The code sends a GET request to the specified
target_urlusingrequests.get(). The response is stored in theresponsevariable.
Once you run this code the response looks like this:
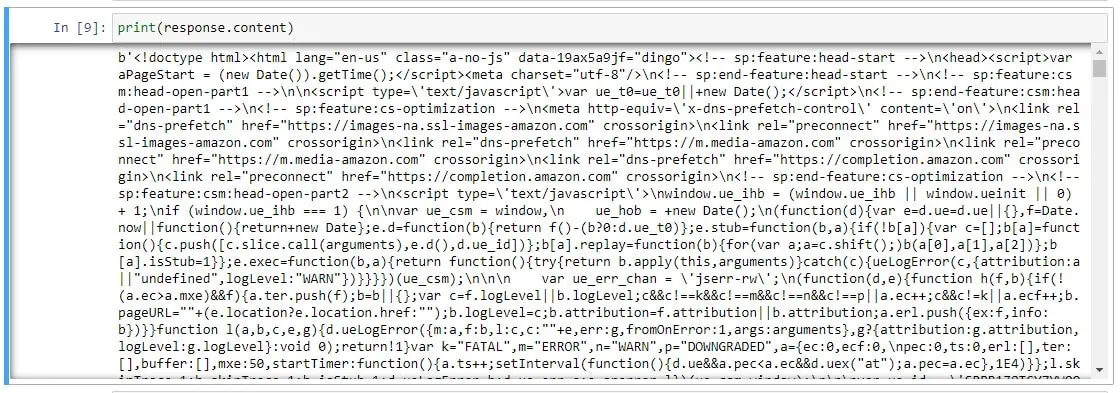
We have successfully downloaded the raw HTML from the target page. Now, we have to decode what we need to parse from this data. It is always ideal to decide in advance what exactly we need from the page.
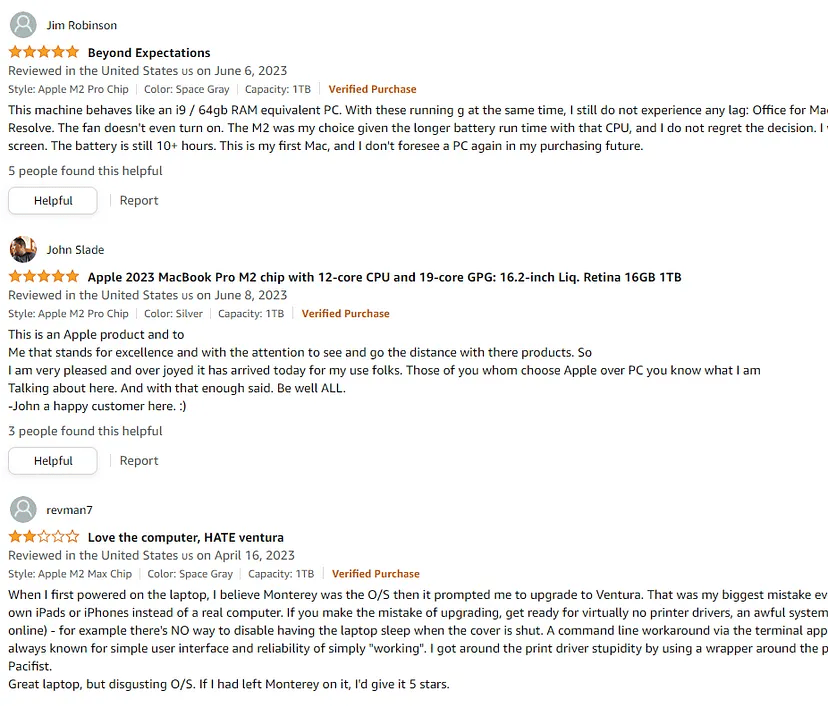
From this page, we are going to parse 10 reviews. Below is a screenshot of the first three reviews as examples.
Parse These Reviews using BeautifulSoup
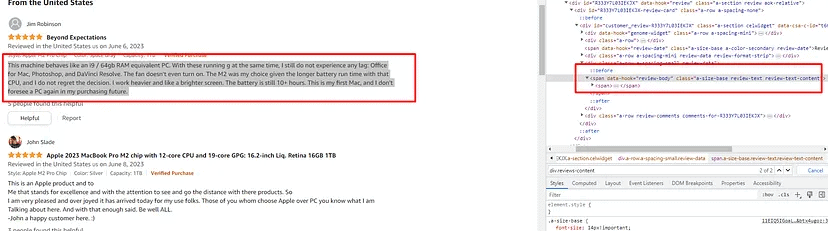
Each review text is stored inside a span tag with attribute name data-hook and value as review-body. To do this, we need to go to Chrome DevTools (if you’re using Google Chrome).
- Go to the page.
- Press right-click.
- Select Inspect.
And all these span tags are stored inside a <div> tag with class reviews-content.
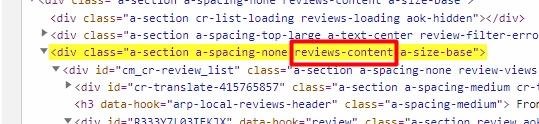
soup = BeautifulSoup(response.text, 'html.parser')
fulldivcontainer = soup.find_all("div",{"class":"reviews-content"})[1]
reviewdata = fulldivcontainer.find_all("span",{"data-hook":"review-body"})
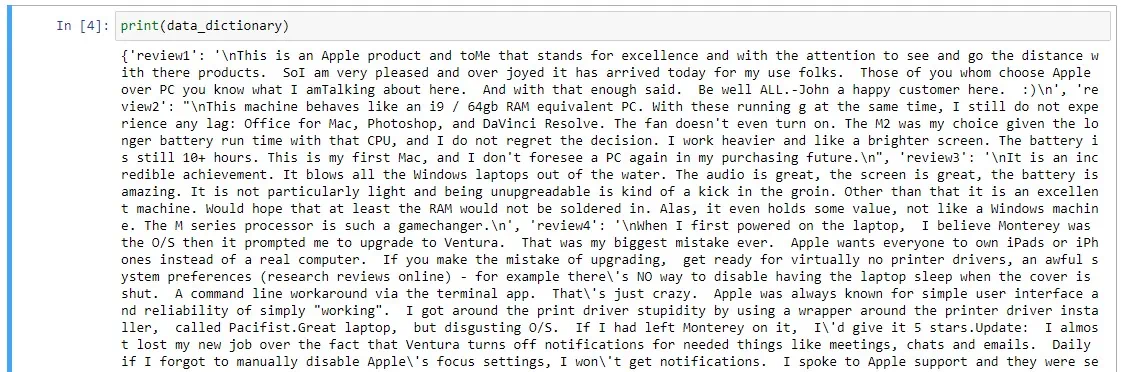
data_dictionary = {}
for i in range(0,len(reviewdata)):
data_dictionary["review{}".format(i+1)]=reviewdata[i].text
print(data_dictionary)Let me explain this code by breaking it down for you.
- The response content is parsed using
BeautifulSoupwith the HTML parser specified as'html.parser'. The parsed result is stored in the soup variable. - The code finds the specific
<div>elements with the class name"reviews-content"within the parsed HTML usingsoup.find_all(). The[1]index is used to select the second matching element since the desired reviews are contained within that particular<div>element. The result is stored in thefulldivcontainervariable. - Within the
fulldivcontainer, the code finds all thespanelements with the attributedata-hookset to"review-body"usingfulldivcontainer.find_all(). The extracted review elements are stored in thereviewdatavariable. data_dictionaryis an empty dictionary.- A loop is set up to iterate over the
reviewdataelements. For each element, the review content is extracted usingreviewdata[i].text. The review content is assigned as a value to thedata_dictionarydictionary with a key formatted as"review{}".format(i+1). - Finally, the code prints the
data_dictionary
Once you run this code the result looks like this:
Do a Sentiment Analysis of Each Review
Finally, the time has arrived for us to use the vaderSentiment library.
You can start it by first creating the object of the SentimentIntensityAnalyzer class. Then we can pass each review to the polarity_scores() function of the object.
sentiment = SentimentIntensityAnalyzer()

review_list = []
negative_list = []
neutral_list = []
positive_list = []
compound_list = []

for x in range(0,10):
    sentiments = sentiment.polarity_scores(data_dictionary["review{}".format(x+1)])
    review_list.append("Review {}".format(x+1))
    negative_list.append(round(sentiments['neg'], 2))
    neutral_list.append(round(sentiments['neu'], 2))
    positive_list.append(round(sentiments['pos'], 2))
    compound_list.append(round(sentiments['compound'], 2))
    print("Sentiment of review {}".format(x+1))
print(sentiments)- The code initializes an instance of the
SentimentIntensityAnalyzerclass from thevaderSentiment.vaderSentimentmodule. This analyzer is responsible for determining the sentiment intensity of text. - A loop is set up to iterate from 0 to 9 (inclusive), using the range function
range(0, 10). This means the loop executes 10 times (we have 10 reviews only). - Within each iteration of the loop, the code retrieves the review text from the
data_dictionarylist using the keyreview{}".format(x+1). Thex+1ensures that the review keys start from 1 instead of 0. - The
sentiment.polarity_scores()method is called on the review text, which returns a dictionary containing sentiment scores. Thesentimentobject is an instance ofSentimentIntensityAnalyzerinitialized earlier. - The sentiment scores dictionary is assigned to the
sentimentsvariable. - The code then prints the sentiment analysis results for each review. It displays the sentiment analysis score for the respective review by using the format method to incorporate the review number (
x+1), and it prints the sentiment scores (sentiments). - This process repeats for each review, providing sentiment analysis results for all 10 reviews.
- The code line that uses
append()is to assign new lists to create a DataFrame later. These new lists arereview_list,negative_list,neutral_list,positive_list, andcompound_list.
Once you run this code the result looks like this:
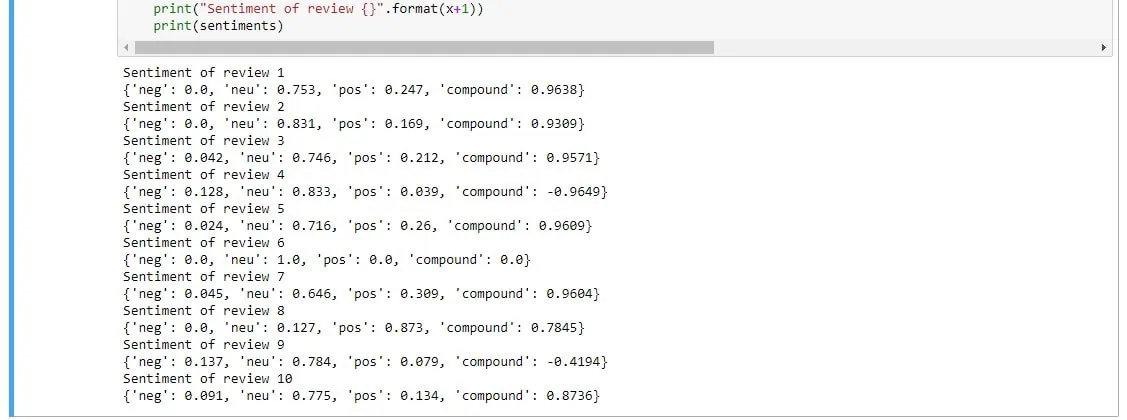
neg: This represents the negativity score for the given text.neu: This represents the neutrality score for the given text.pos: This represents the positivity score for the given text.compound: This represents the compound score, which is a combination of the above three scores. It represents the overall sentiment polarity of the text.
Out of these 10 reviews, we can see that two reviews have negative compound values which indicated that review 3 and review 9 are both negative and the rest are slightly positive or positive.
Read more: Scrape Amazon Product Name, Price & Description Using Python
Create a DataFrame for Final Results
data = zip(negative_list, neutral_list, positive_list, compound_list)
df = pd.DataFrame(data, index=review_list)
df.columns = ["Negative Score", "Neutral Score", "Positive Score", "Compound Score"]

print(df)
Since you have raw data, it’s time to format the it into a spreadsheet to make it more readable. The function above takes care of that. If you run the code, the results should now be akin to a spreadsheet with columns and rows. The code also round the numbers to two decimal points.
Once you run this code the result looks like this:

Done! You can now effectively discern the sentiments of the 10 reviews from the Amazon page.
Conclusion: Run a Sentiment Analysis Today
In this tutorial, we saw how data can be scraped and analyzed. With various Python packages, this task was implemented with ease. With growing economies, it becomes very crucial for companies to keep track of their reviews. One slight mistake can make their image negative.
References:
Sentiment analysis (opinion mining)
What is Sentiment Analysis? A Complete Guide for Beginners